Background
One of the major focuses of the Formula SAE competition is student safety – there are several requirements for safety features that must be included in the design, including a firewall that separates the driver of the vehicle from certain engine components and seals against the passage of fluids. The team has been using a carbon fibre panel with side flanges to meet this requirement for several years, but in 2022 (previous year), there were several issues with sealing, manufacturing, and ergonomics in the design that needed to be fixed on the fly in order to enter the competition. So, one of my tasks this design season was to investigate solutions to the problems of the previous year, and implement those solutions into the design of the 2023 firewall. This article is a summary of the full report that I wrote, which can be found by following the link at the bottom of this page.
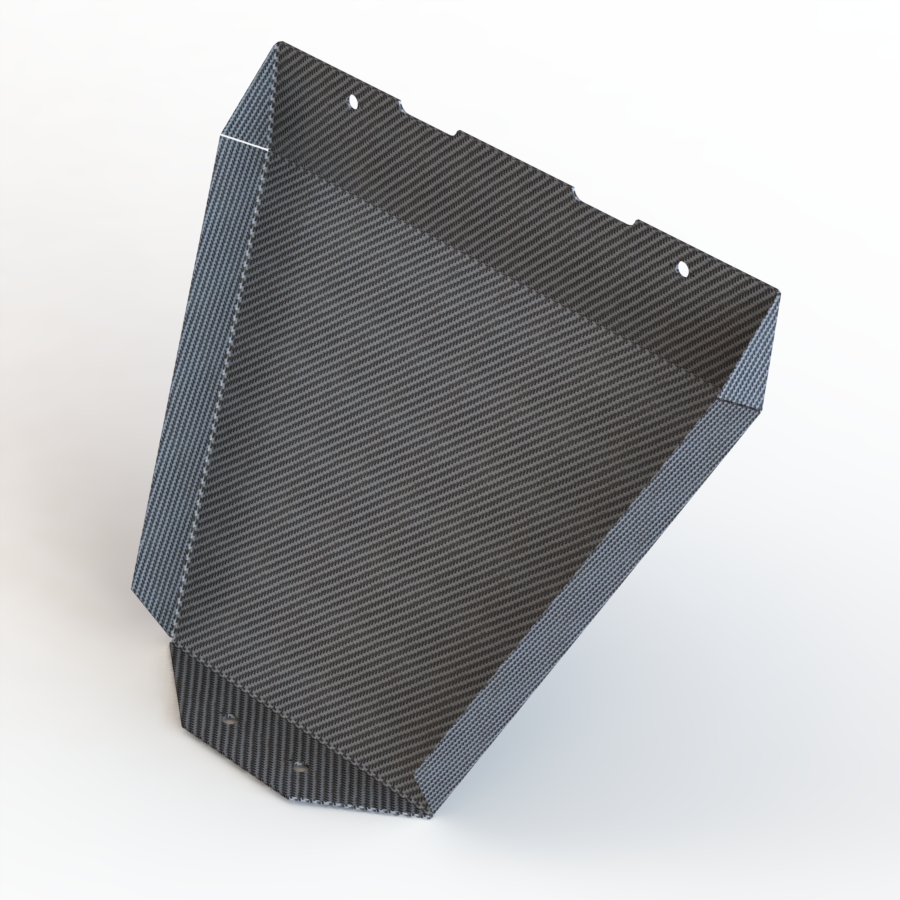
2022 Design (old)
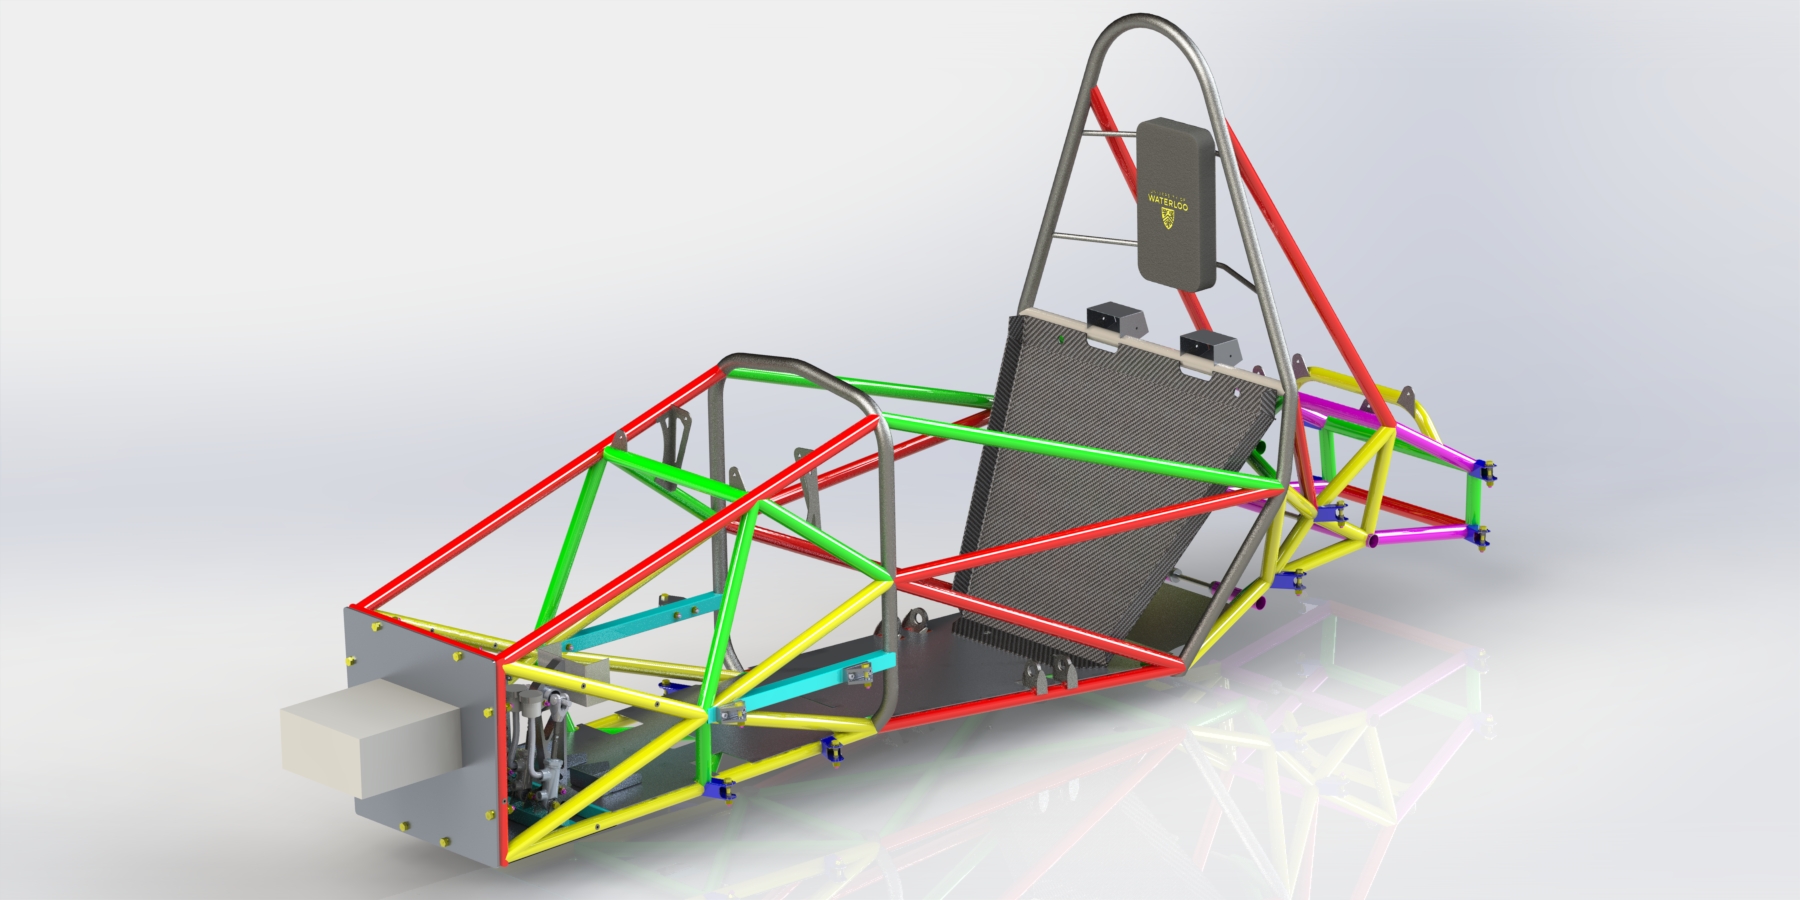
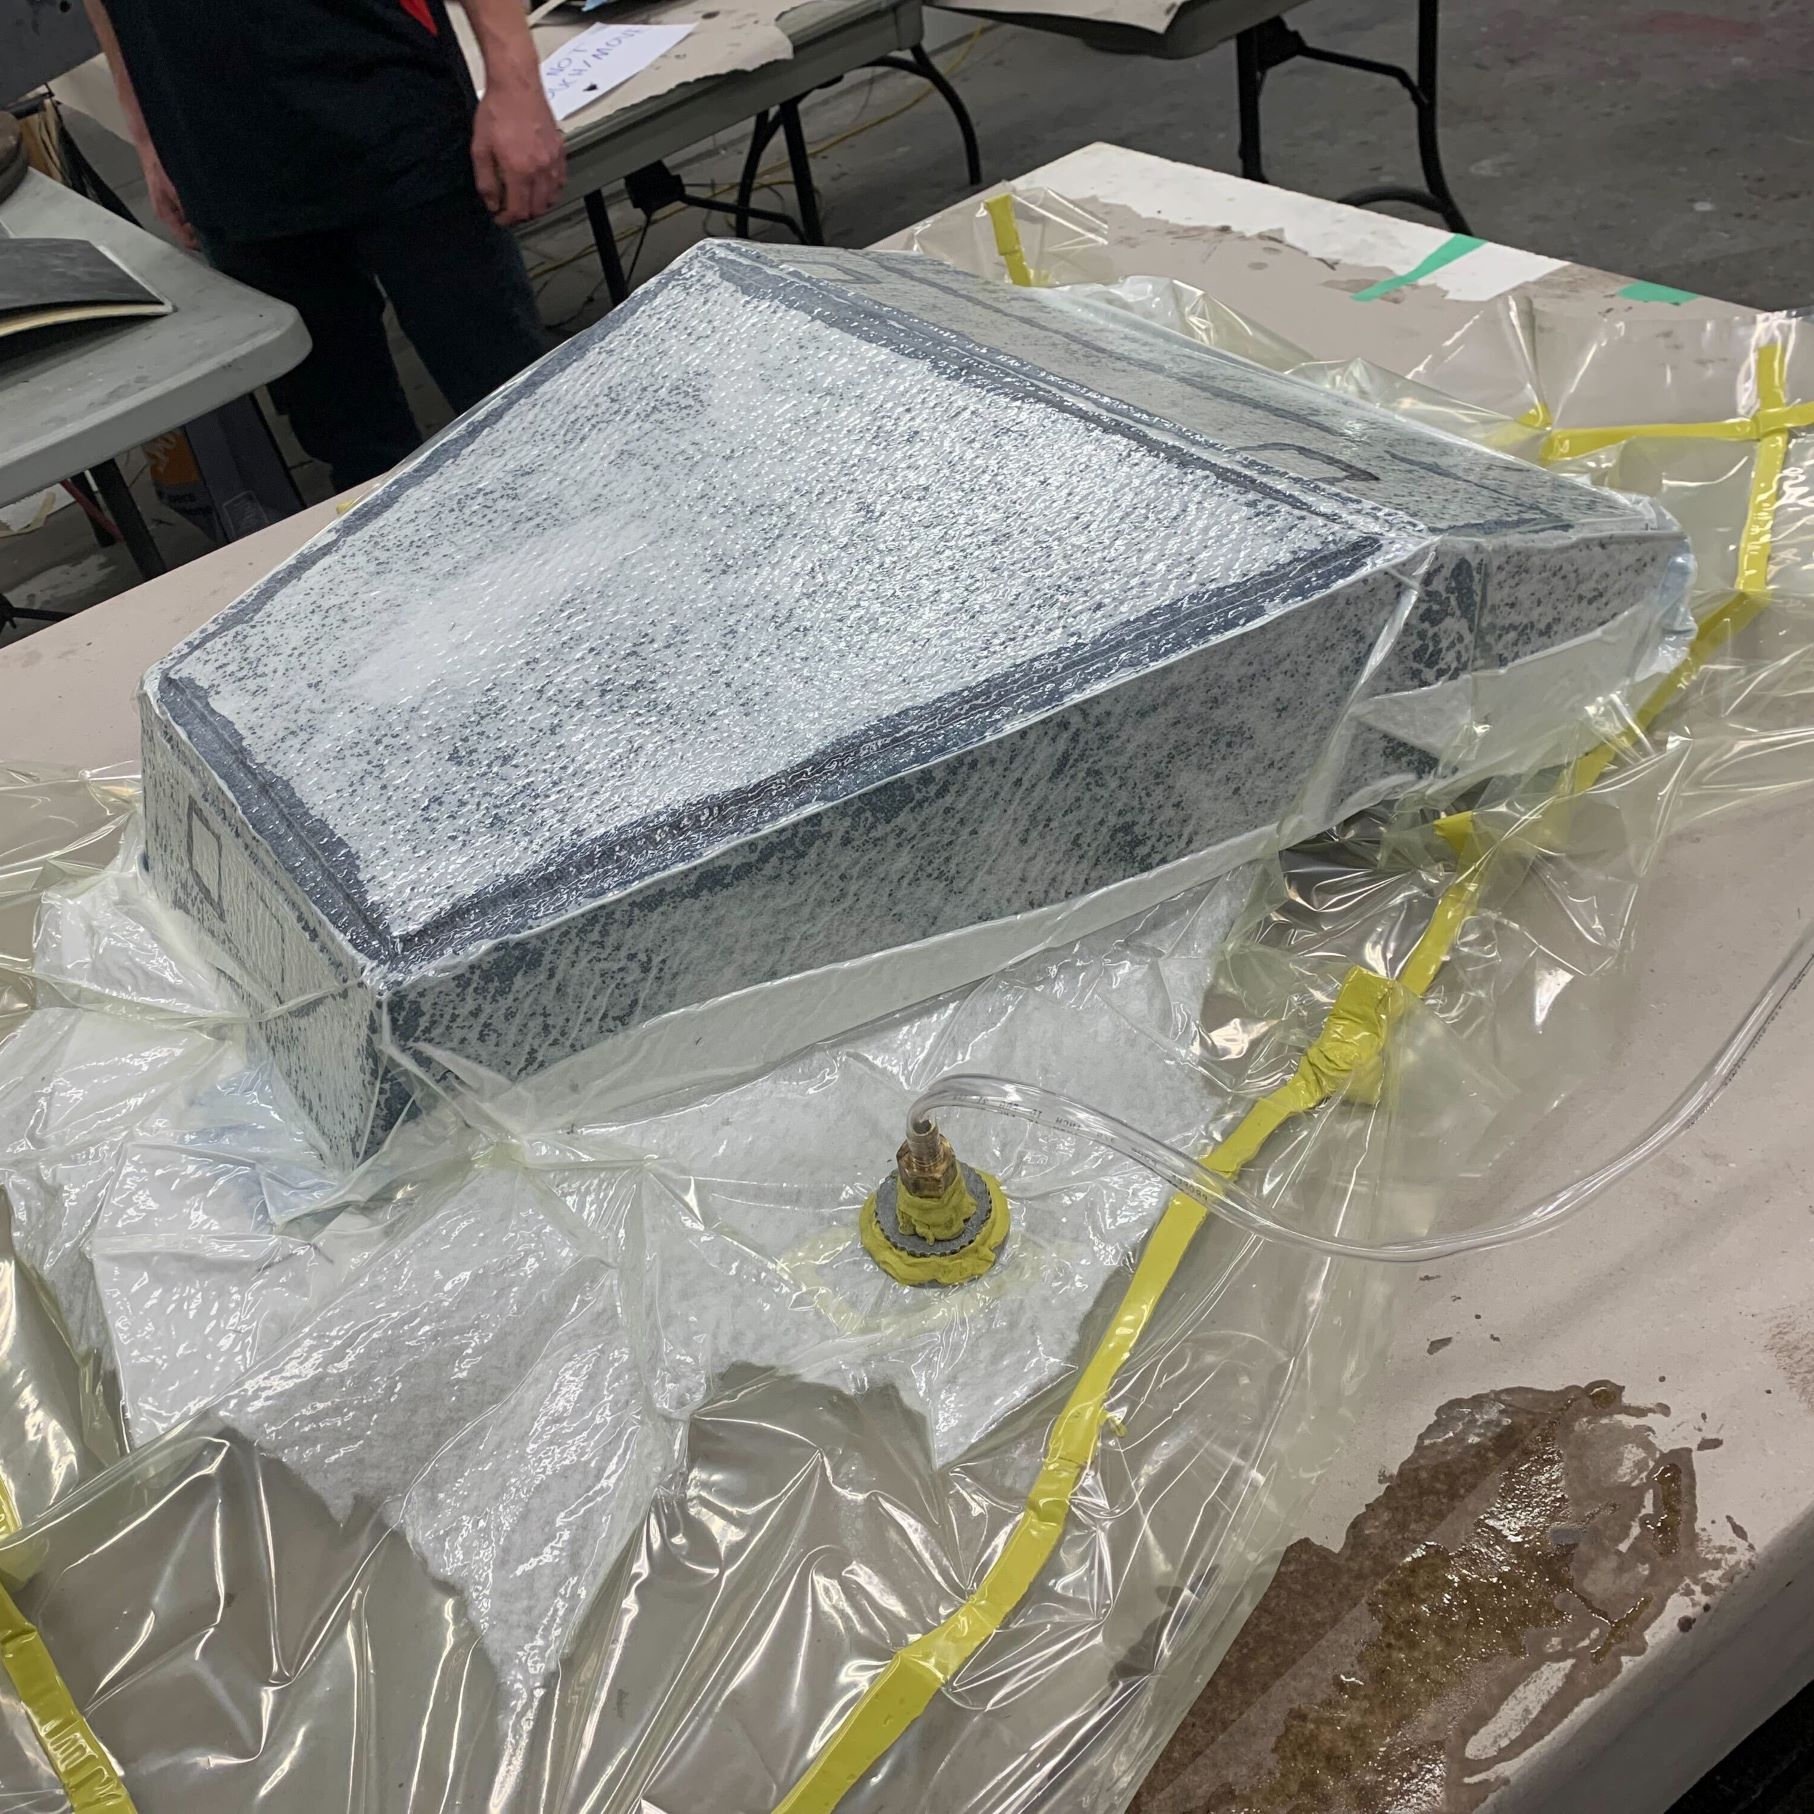
The firewall is a composite material: the base is 3 mm ROHACELL foam core, and this is covered in four layers of 3K twill carbon fibre. The carbon fibre is covered with a clear, heat resistant resin which will protect the driver in the event of a fire. There are also cut-outs in the foam core for 1/8” aluminum plates to be inserted so that the holes drilled into the firewall for mounting will have adequate support. The carbon fibre and foam are laid up on a sheet metal mold which is made by laser-cutting a 0.065” sheet of aluminum into the flat pattern, then using a sheet metal brake to bend it into the 3D shape. Once the carbon fibre and foam are in position on the mold, resin is poured onto the carbon fibre, and the whole assembly is placed inside a vacuum bag to cure. The firewall sits behind the driver because the engine is in the rear of the vehicle, behind the driver. Everything that the firewall must protect against is situated around the engine.
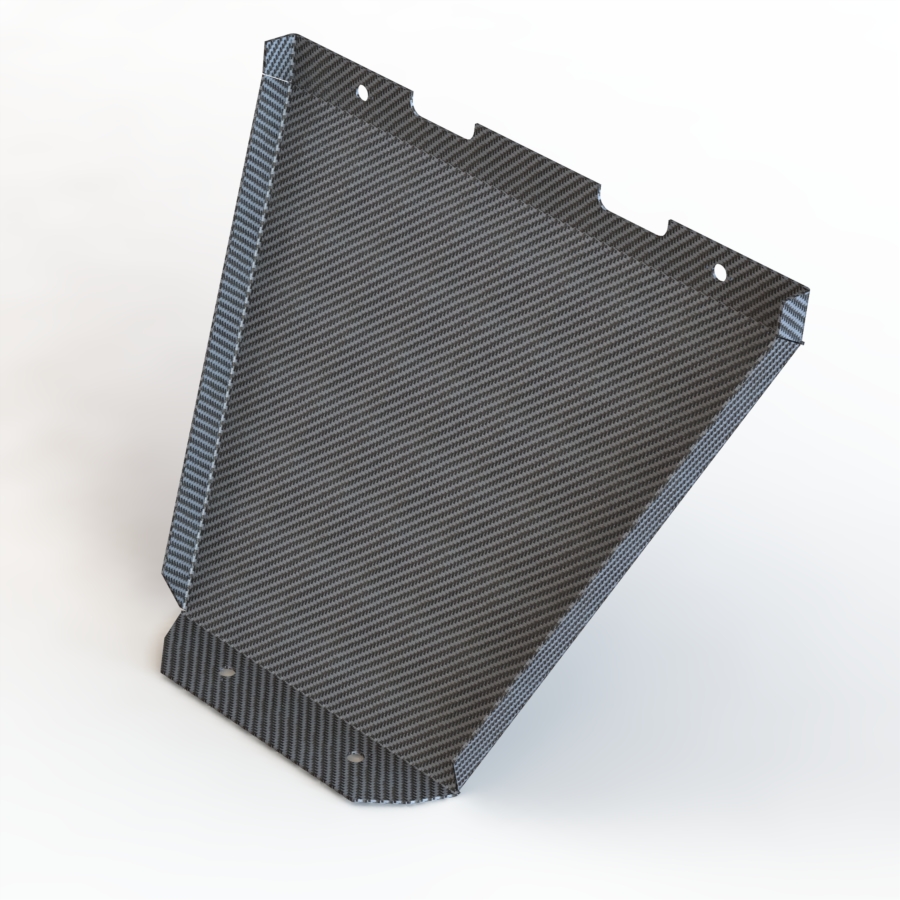
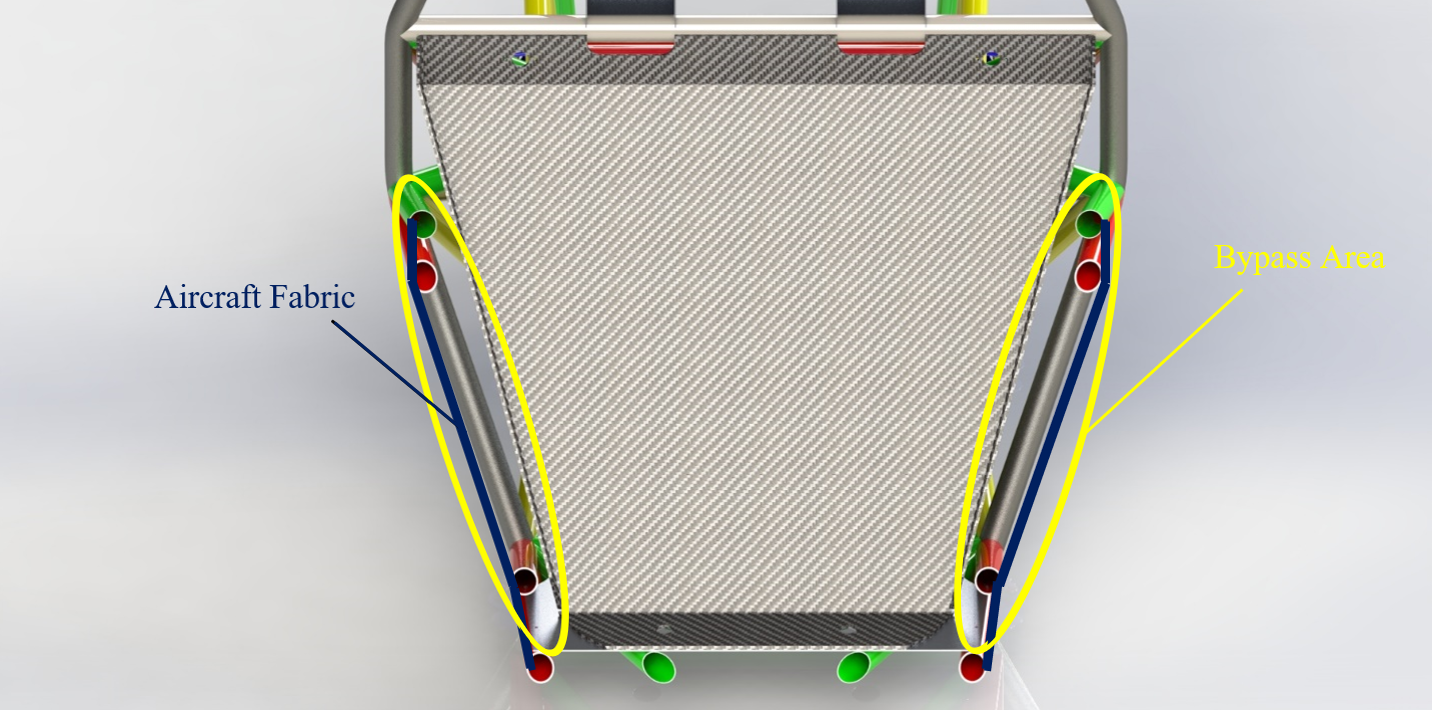
The first issue with the 2022 design is that the firewall had openings on either side of the cockpit, which meant that it failed to create a seal between the cockpit and the engine components. To allow the vehicle to enter the competition, foam mats were cut to shape, wrapped in tape, and inserted into the openings at the last minute. Obviously, this was a subpar solution as the foam mats were not fire-rated. This was also an issue with the shoulder harness cut-outs, as they were about 10 mm too deep, resulting in bypass area that had to be covered with more tape.
Manufacturing was also difficult because the mold had some issues which caused the carbon fibre to not sit flat. There were three features that caused this: the mold flanges were the same size as the actual firewall, so excess material had to be wrapped underneath, the gap between the side flange and bottom flange left unsupported material, and the edges of the foam occasionally caught the carbon fibres and stretched out the material. Due to the manufacturing difficulties, the aluminum inserts were also misaligned with the hole locations once installed, meaning that the firewall had to be elastically deformed when mounting to allow the holes to line up properly.
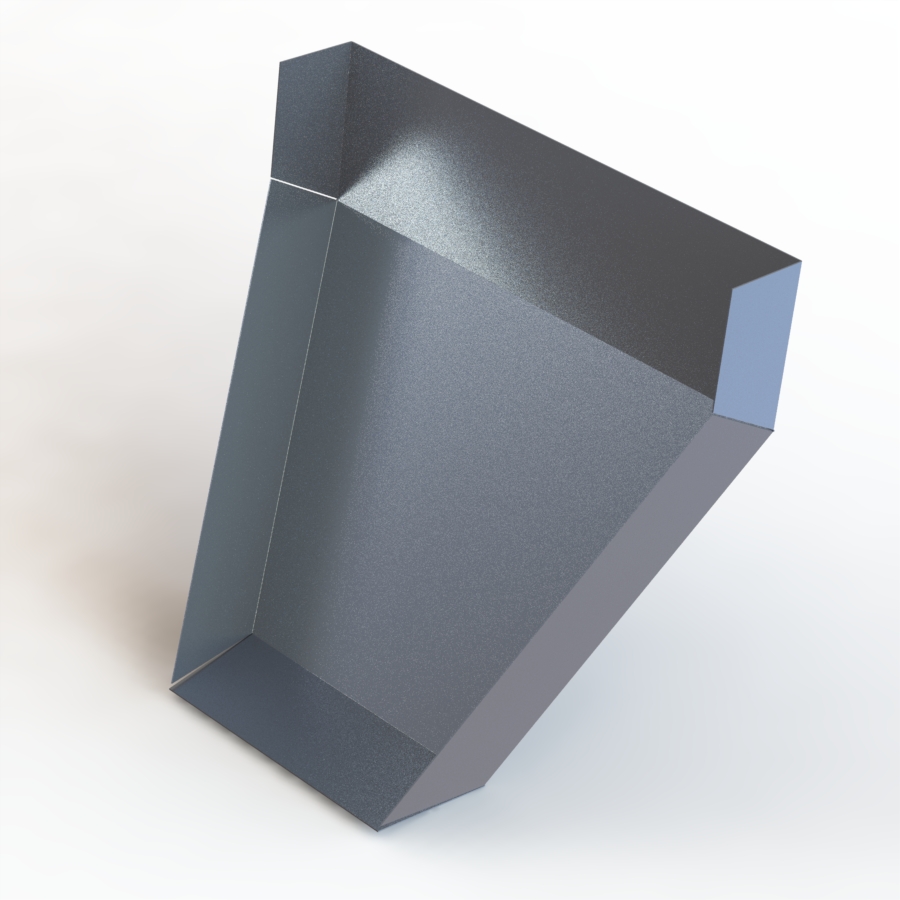
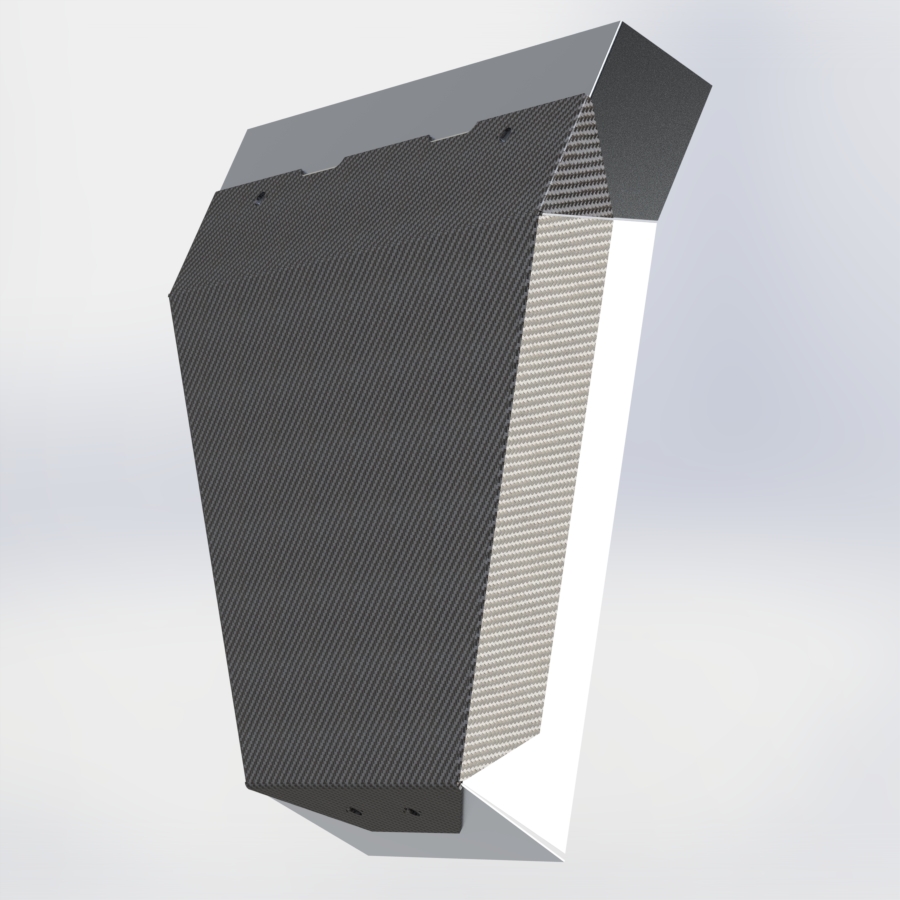
2023 Design (new)
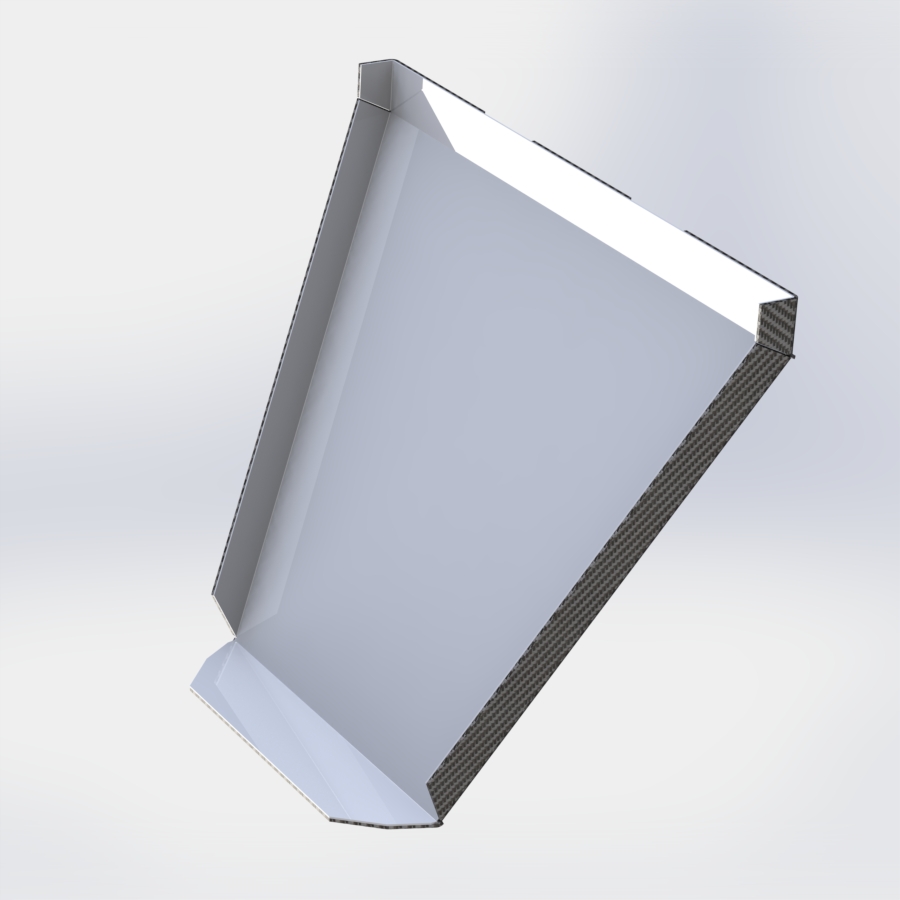
Firstly, the shoulder harness cut-outs at the top of the firewall were halved to reduce the bypass area, as discussed earlier. However, the major problem that I focused on when designing this was the sealing of the side of the firewall. My first thought was to widen the firewall so that the side flanges could meet the aircraft fabric on the outsides of the cockpit, but the frame tubes are in the way of this. As well, creating cut-outs for the frame tubes makes it so that the firewall is very difficult, if not impossible to remove. So instead, the side flanges were doubled in size to allow for a greater sealing surface, and expanding foam will be used to create form-fitting inserts for each side of the firewall. Using expanding foam will create a perfect seal, regardless of manufacturing errors, as well as allow the firewall to have simpler geometry.
The expanding foam that the team has used in the past (we have a lot of extra) is a two-part mixture which expands into a rigid polyurethane foam. So to make the foam side pieces, the components will be mixed and poured into a garbage bag between the side of the cockpit and the firewall. Supporting material, like wood boards will be used to make sure that the foam expands upwards. Once the foam has cured, the garbage bag can be removed from the vehicle, and then cut off the inserts. Because the foam is not rated for fire resistance on its own, it will need to be covered in the same carbon fibre and resin as the firewall. This will allow it to safely seal in the event of a fire, and the carbon fibre will also improve the aesthetic of the inserts, avoiding showing the pale yellow colour of the foam.
To improve manufacturing, the firewall mold was designed to have flanges that are 45 mm larger than the actual firewall – this is so that any carbon fibre irregularities created by the edge of the mold will be outside of the actual firewall. The excess material will be cut off with a Dremel afterwards. The mold also does not have any gaps that the carbon fibre will have to bridge, which will help with the same problem. Just in case the manufacturing does not exactly match CAD (which is likely), the aluminum inserts are 60% larger to allow for more error when drilling the holes for the firewall fastener. Finally, the foam inserts will be chamfered to allow the carbon fibre to transition smoothly between sections, without catching on the edges. The mold material and manufacturing method will stay the same as last year.
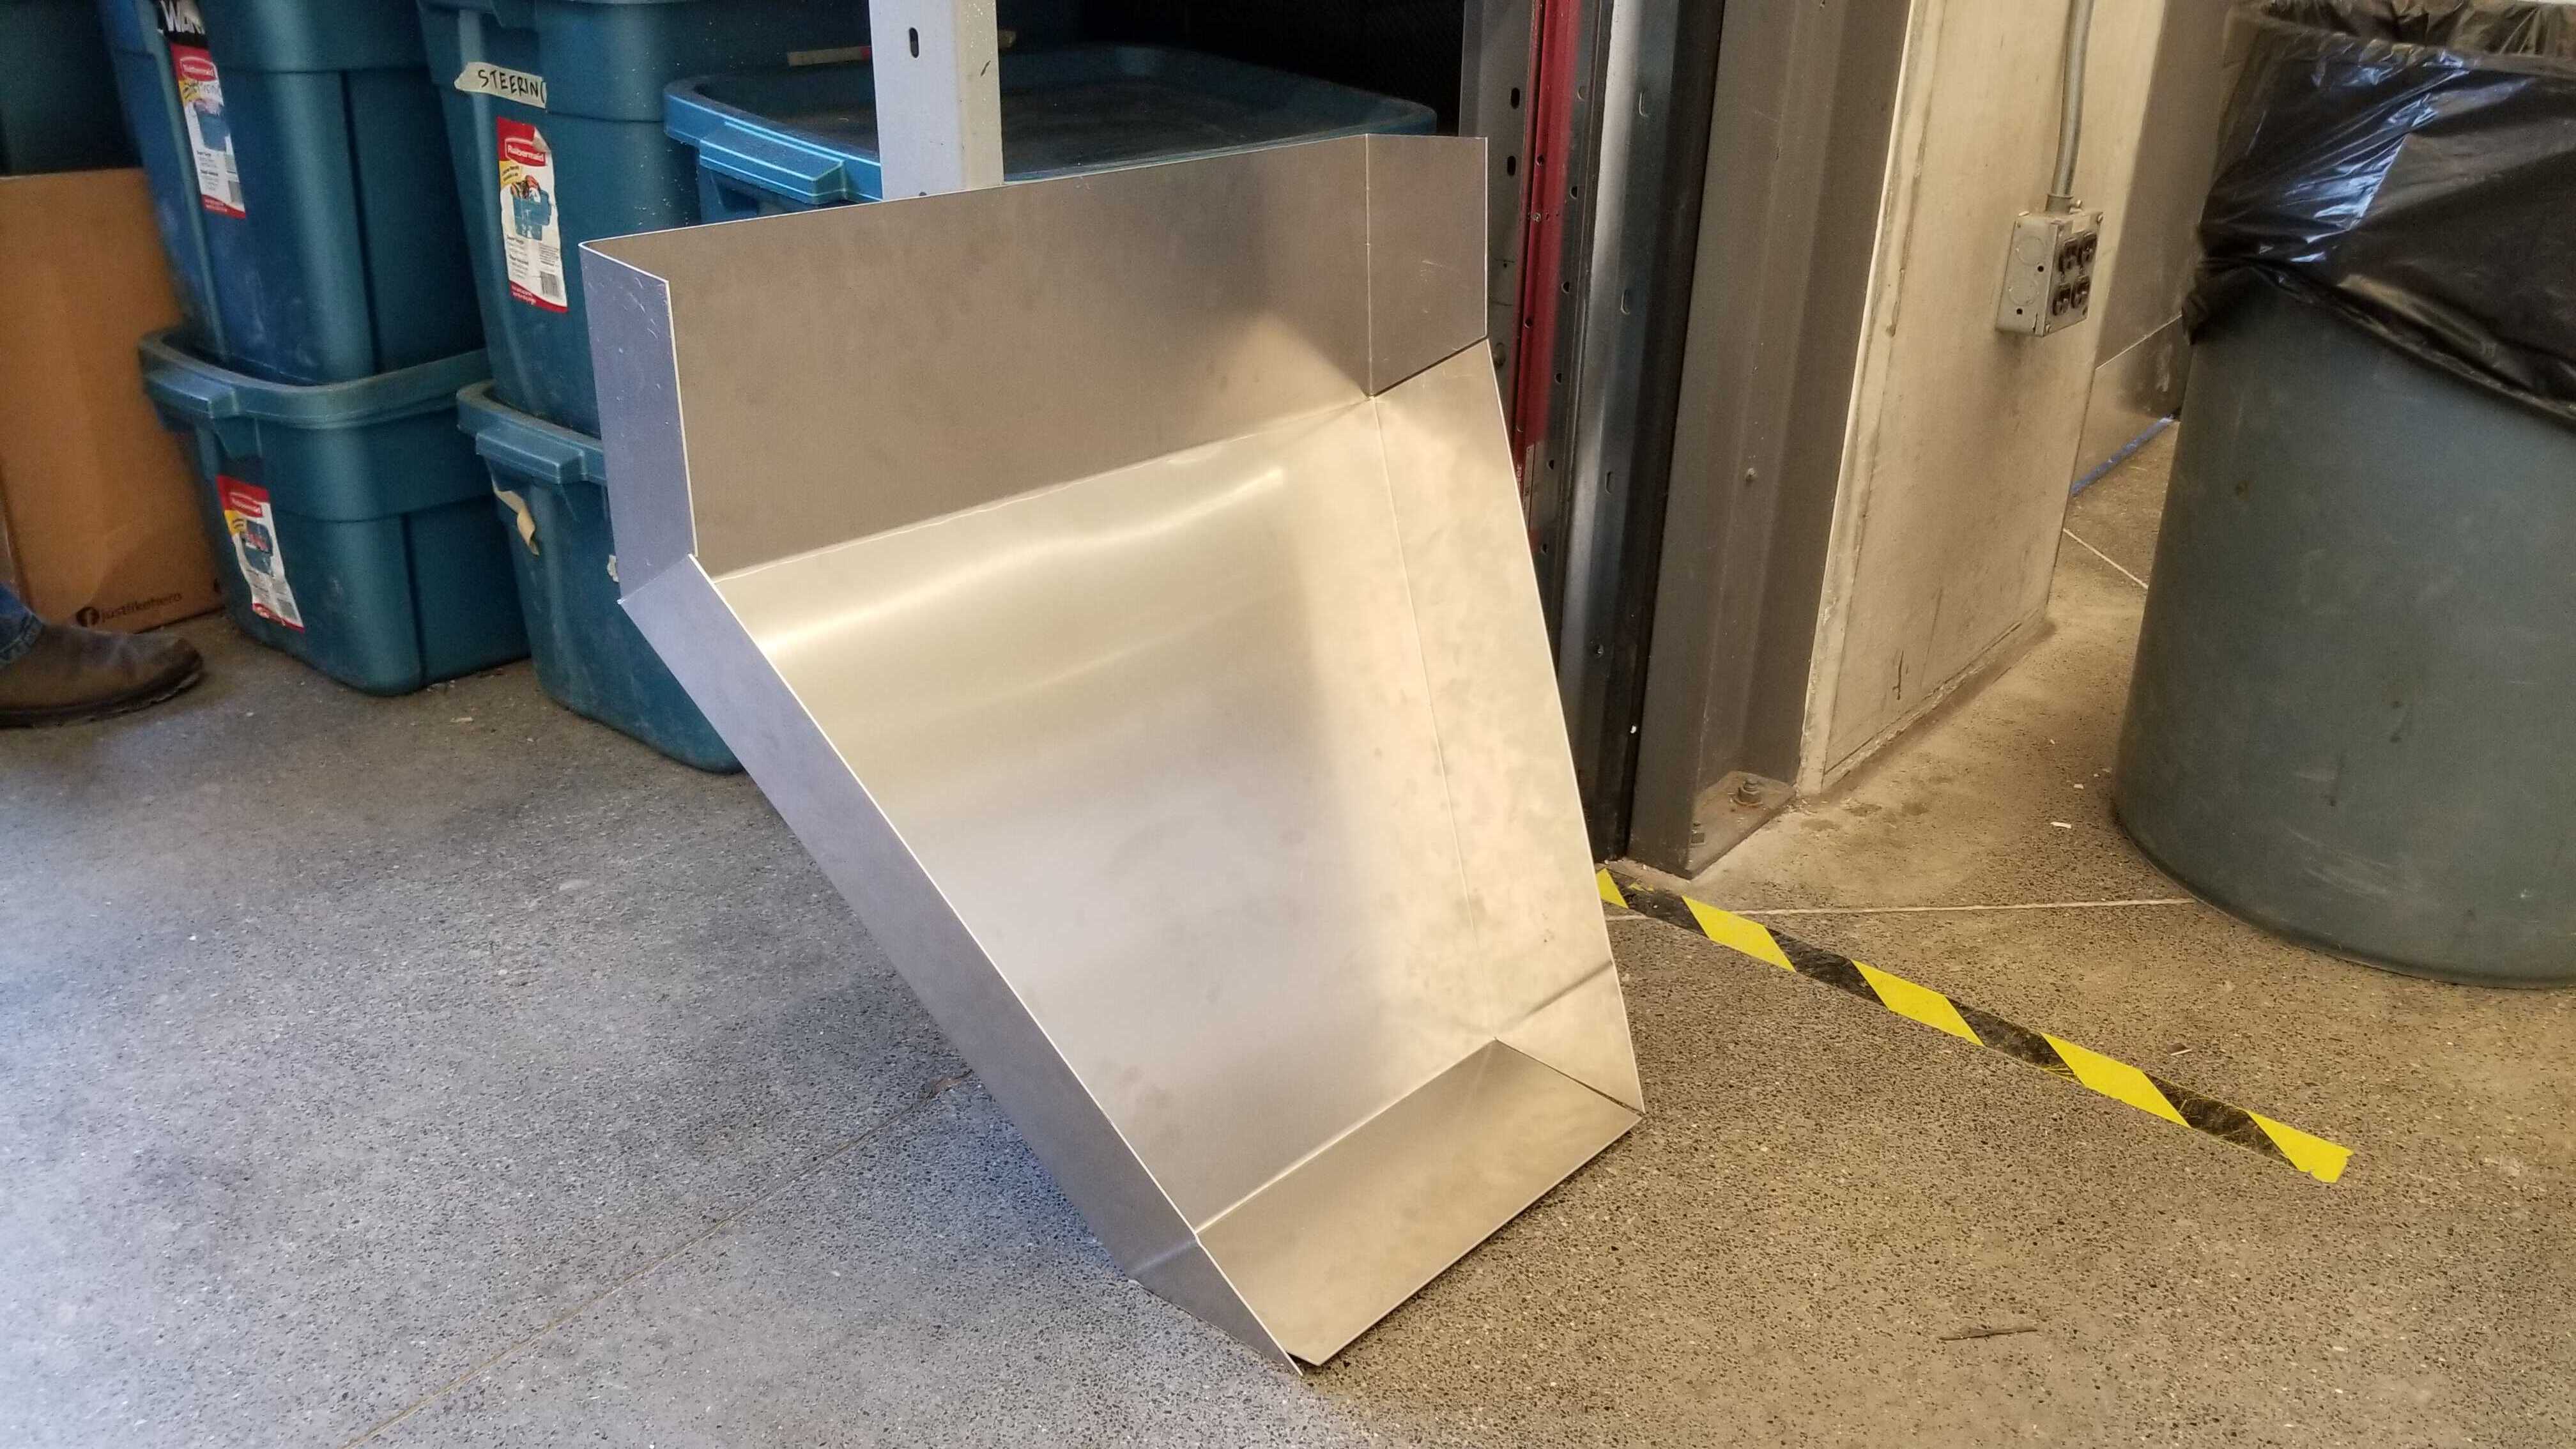
2023 Manufacturing
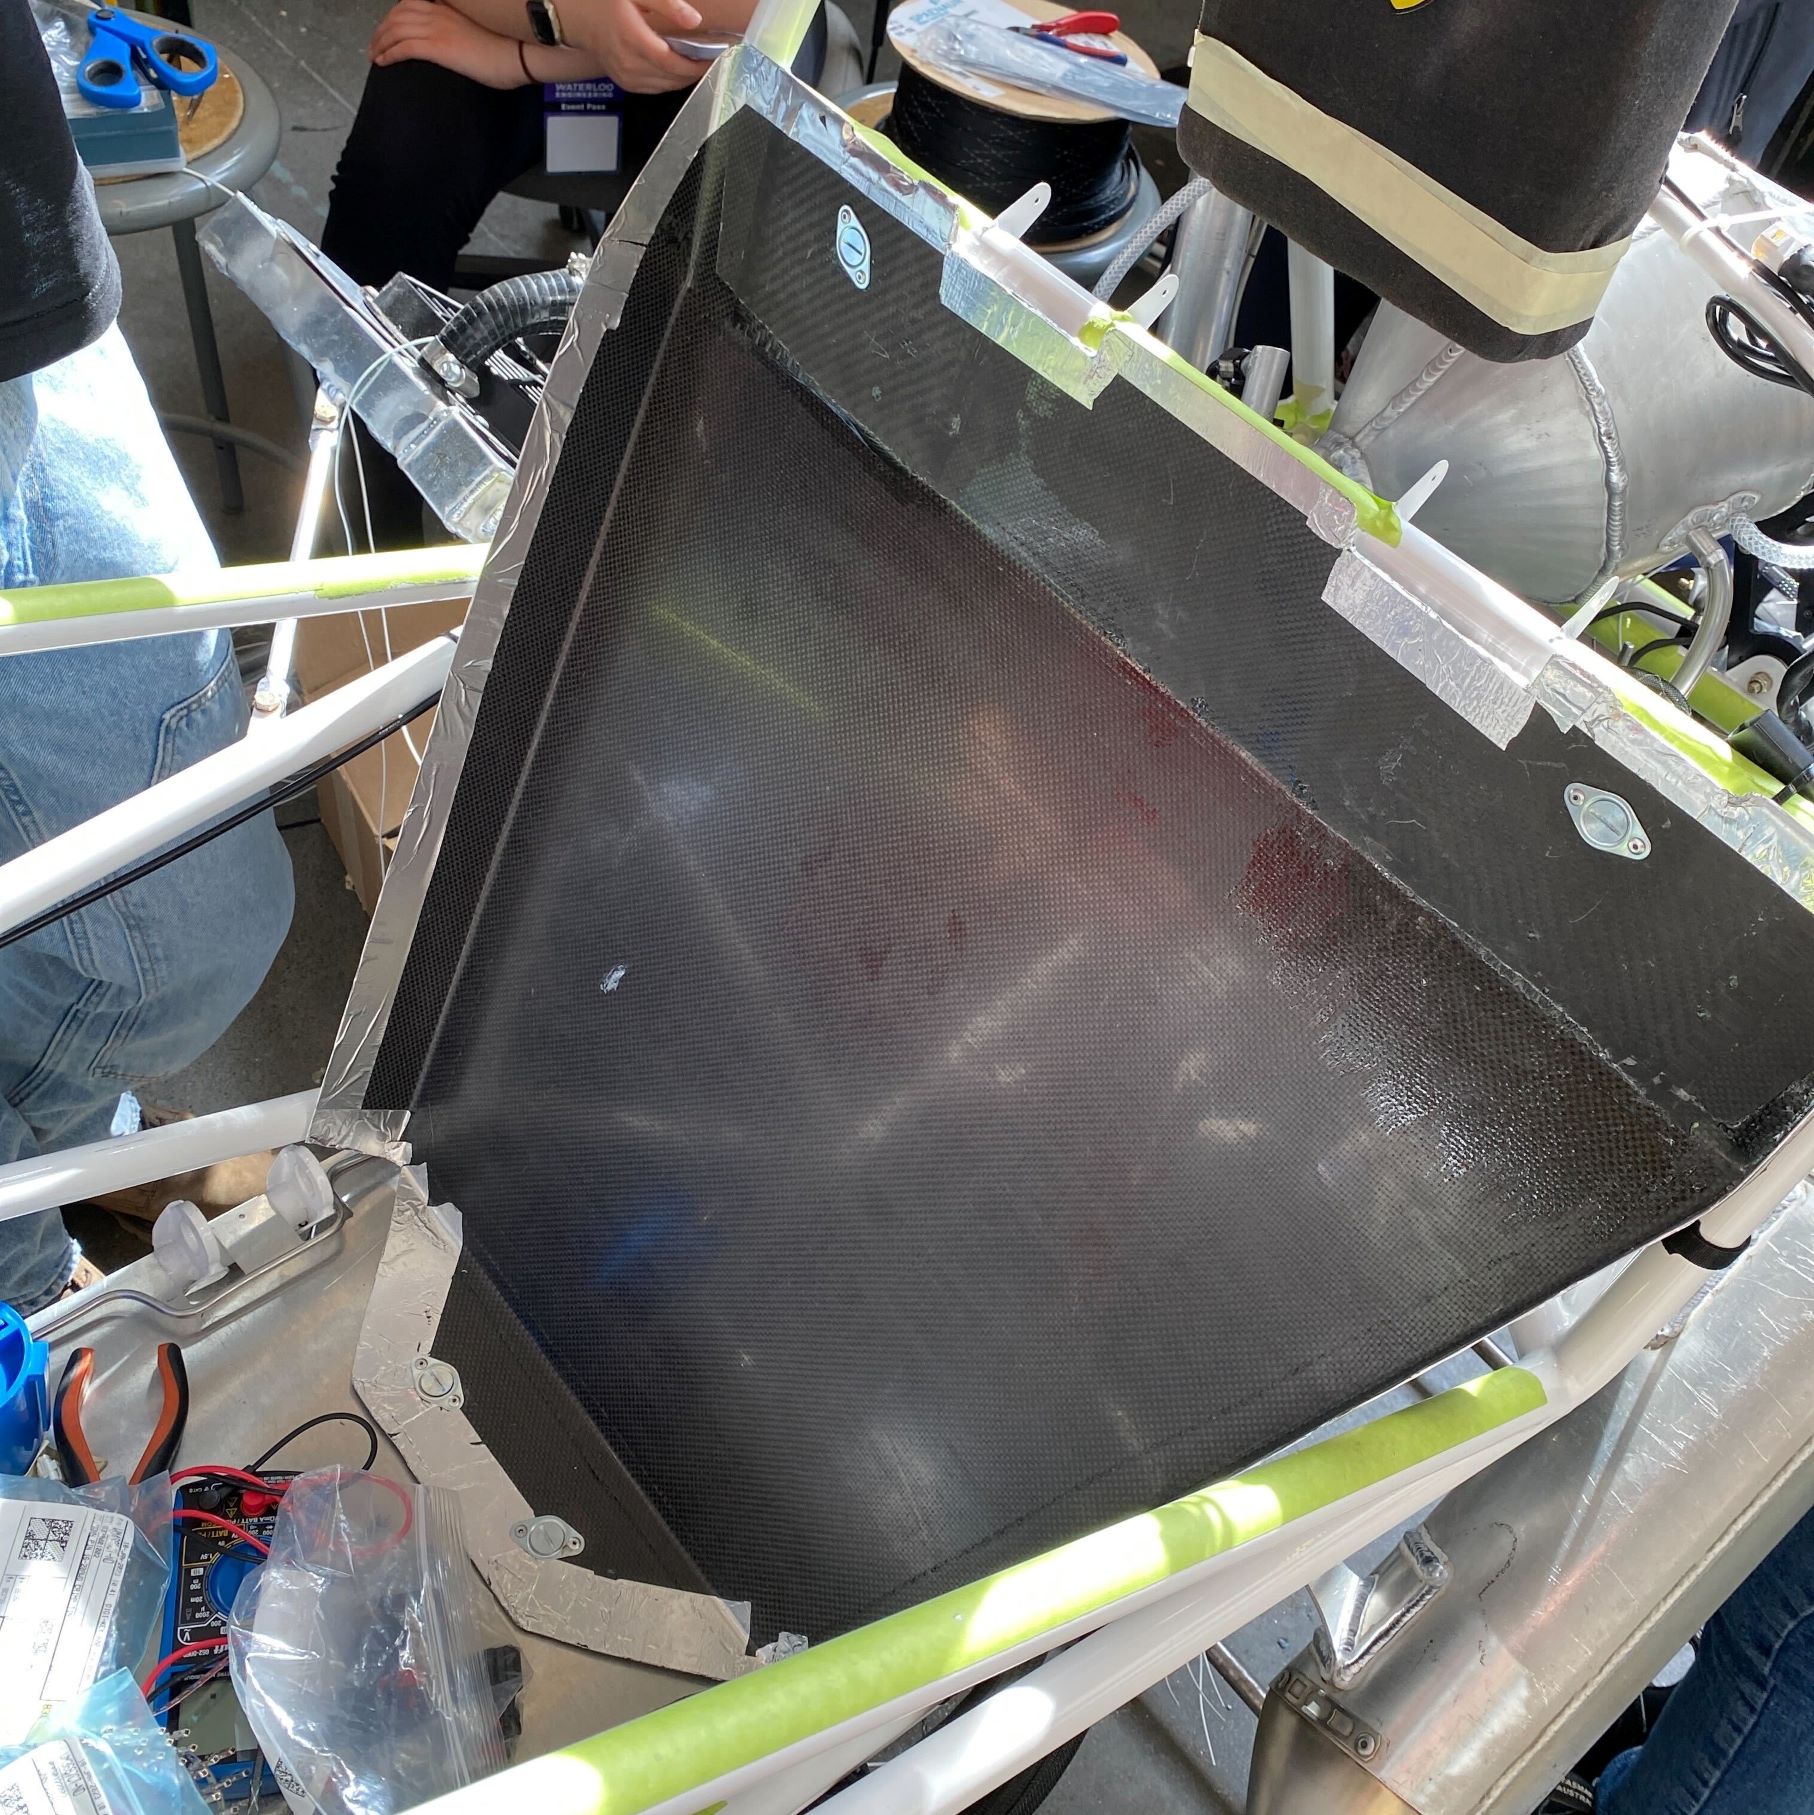
When I got the mold back, I saw that the laser-cutting had gone well, but the bending ended up being a real pain. Unfortunately, the sheet metal brake in the student machine shop was not really suited to make this big of a part, so parts of the tray were colliding with the brake when trying to bend the edges up 90 degrees. Luckily, I was able to get help from the other machine shop at Waterloo, where they have a much better brake, which was larger and had more adjustability. With the brake, I was able to finish up the mold, and it turned out really crisp!
The lay-up went very well, except for one small issue... they installed the upper foam core upside down! Unfortunately I couldn't be there to help with the layup since I was on co-op, and I guess they didn't look too hard at my drawing before they went for it. We had to cut it out and reinstall it, and luckily this didn't waste too much time, or affect strength. Once this was done, I dremelled the shoulder harness cut-outs as well as trimmed the flanges, and we had a working firewall! We also added aluminum tape to the edges to prevent people from cutting themselves.
As for the foam side pieces, we decided to cut blocks to shape to form the basic shape before using expanding form to make the form fit. This is because the foam blocks are slightly lighter, and using less expanding foam allowed us to make the firewall faster. This strategy ended up working very well.
Conclusion
During this project, I improved my design skills by learning the firewall manufacturing method and considering those factors when analyzing potential solutions. Manufacturability is a huge part of design that is often left out or completed as an afterthought, but it should be considered right from the start, given that the best solution in the world is useless if it cannot be made! I am pretty happy with how this design turned out, and I think that I'll use pretty much the same design next year, only changing the mounts to fit the new chassis. I always aim for perfection, but it's pretty rare that there aren't any changes to make for next year!